第二回では、JWTベースフローを使用した組織の認証で、非公開鍵と自己署名デジタル証明書の作成からサーバーキーの暗号化までの手順をご説明しました。
第三回の今回は、CircleCI を DevHub に接続から最後のCircleci での自動ビルドまでの設定して、動かしてみましょう。
前回の記事はこちら
CircleCI を DevHub に接続
CircleCI を認証して接続アプリケーション経由でコンテンツを Dev Hub に転送できるようにします。
手順①コマンドプロンプトを起動し、server.key ファイルがあるフォルダから JWT ベース認証を実行できることを確認します。
以下のコマンドを実行
</p>
<p>>sfdx auth:jwt:grant –clientid <your_consumer_key> –jwtkeyfile server.key –username <your_username> –setdefaultdevhubusername</p>
<p>
【実行例】
</p>
<p>>sfdx auth:jwt:grant –clientid 3MVG95mg0lk4batiP7Q5f8gZVROjIpEdZT… –jwtkeyfile server.key –username cclt.sfdc@mail.com –setdefaultdevhubusername</p>
<p>
以下のようなメッセージが表示されれば認証成功です。
Successfully authorized<ユーザ名> with org ID 00D5h000004bs…
ローカルにsfdx-circleci リポジトリをフォーク
手順①ブラウザで以下のURLへアクセスしsfdx-circleci のリポジトリを表示します。
手順②GitHubを開いたら画面右上の【Fork(フォーク)】リンクをクリックします。

手順③GitHubのログイン画面が表示される場合は、IDとパスワードを入力してログインします。

手順④Create forkを実行して、sfdx-circleciリポジトリをコピーします。
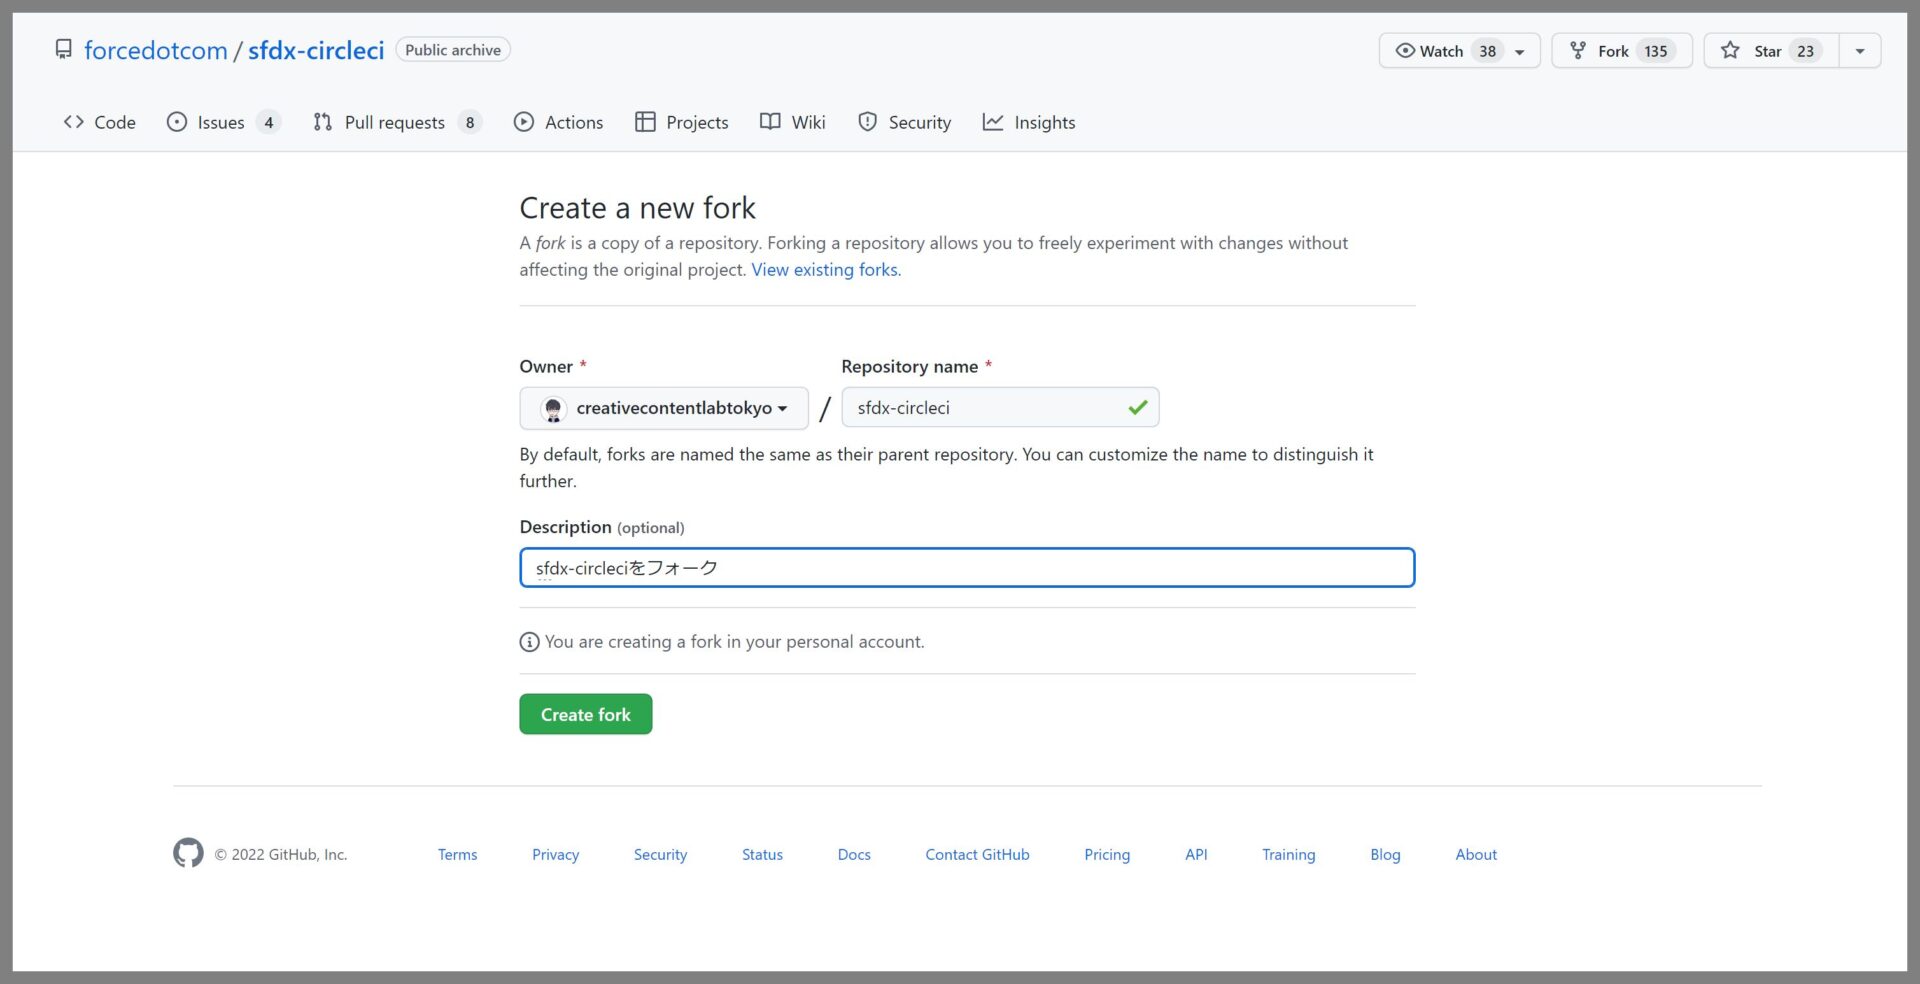
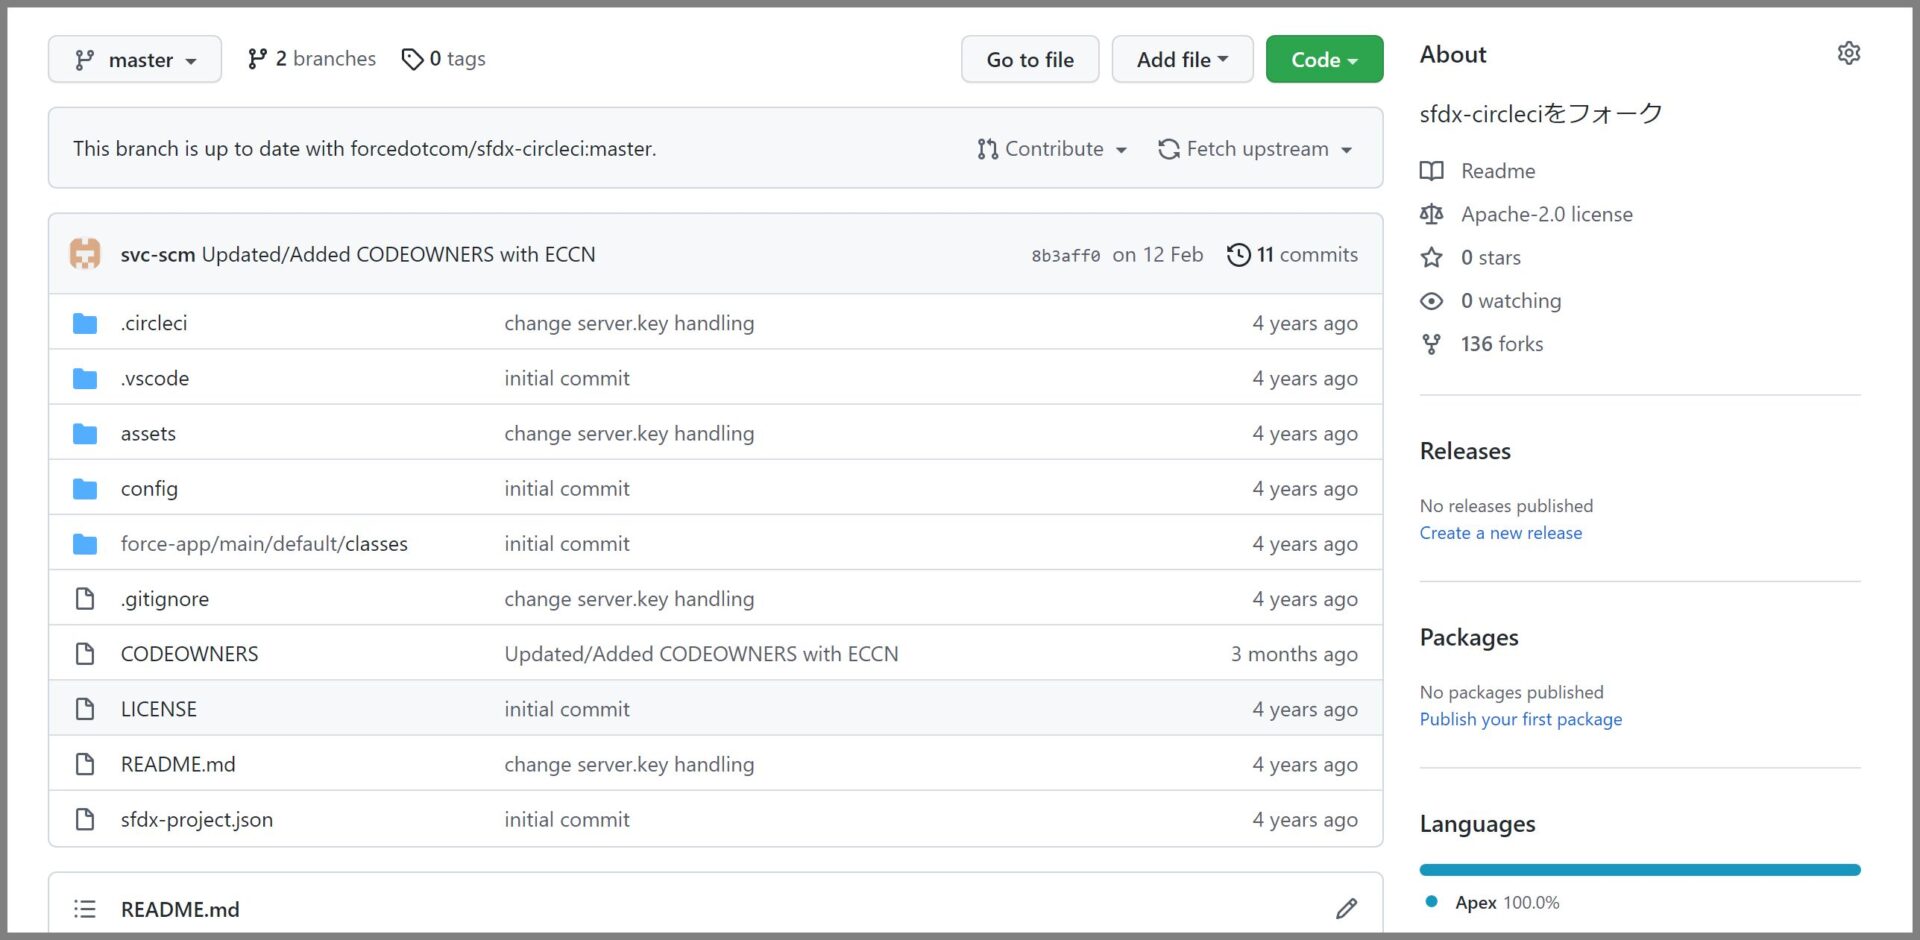
手順⑤フォークが完了すると自分のGitHubに以下の内容が表示されます。
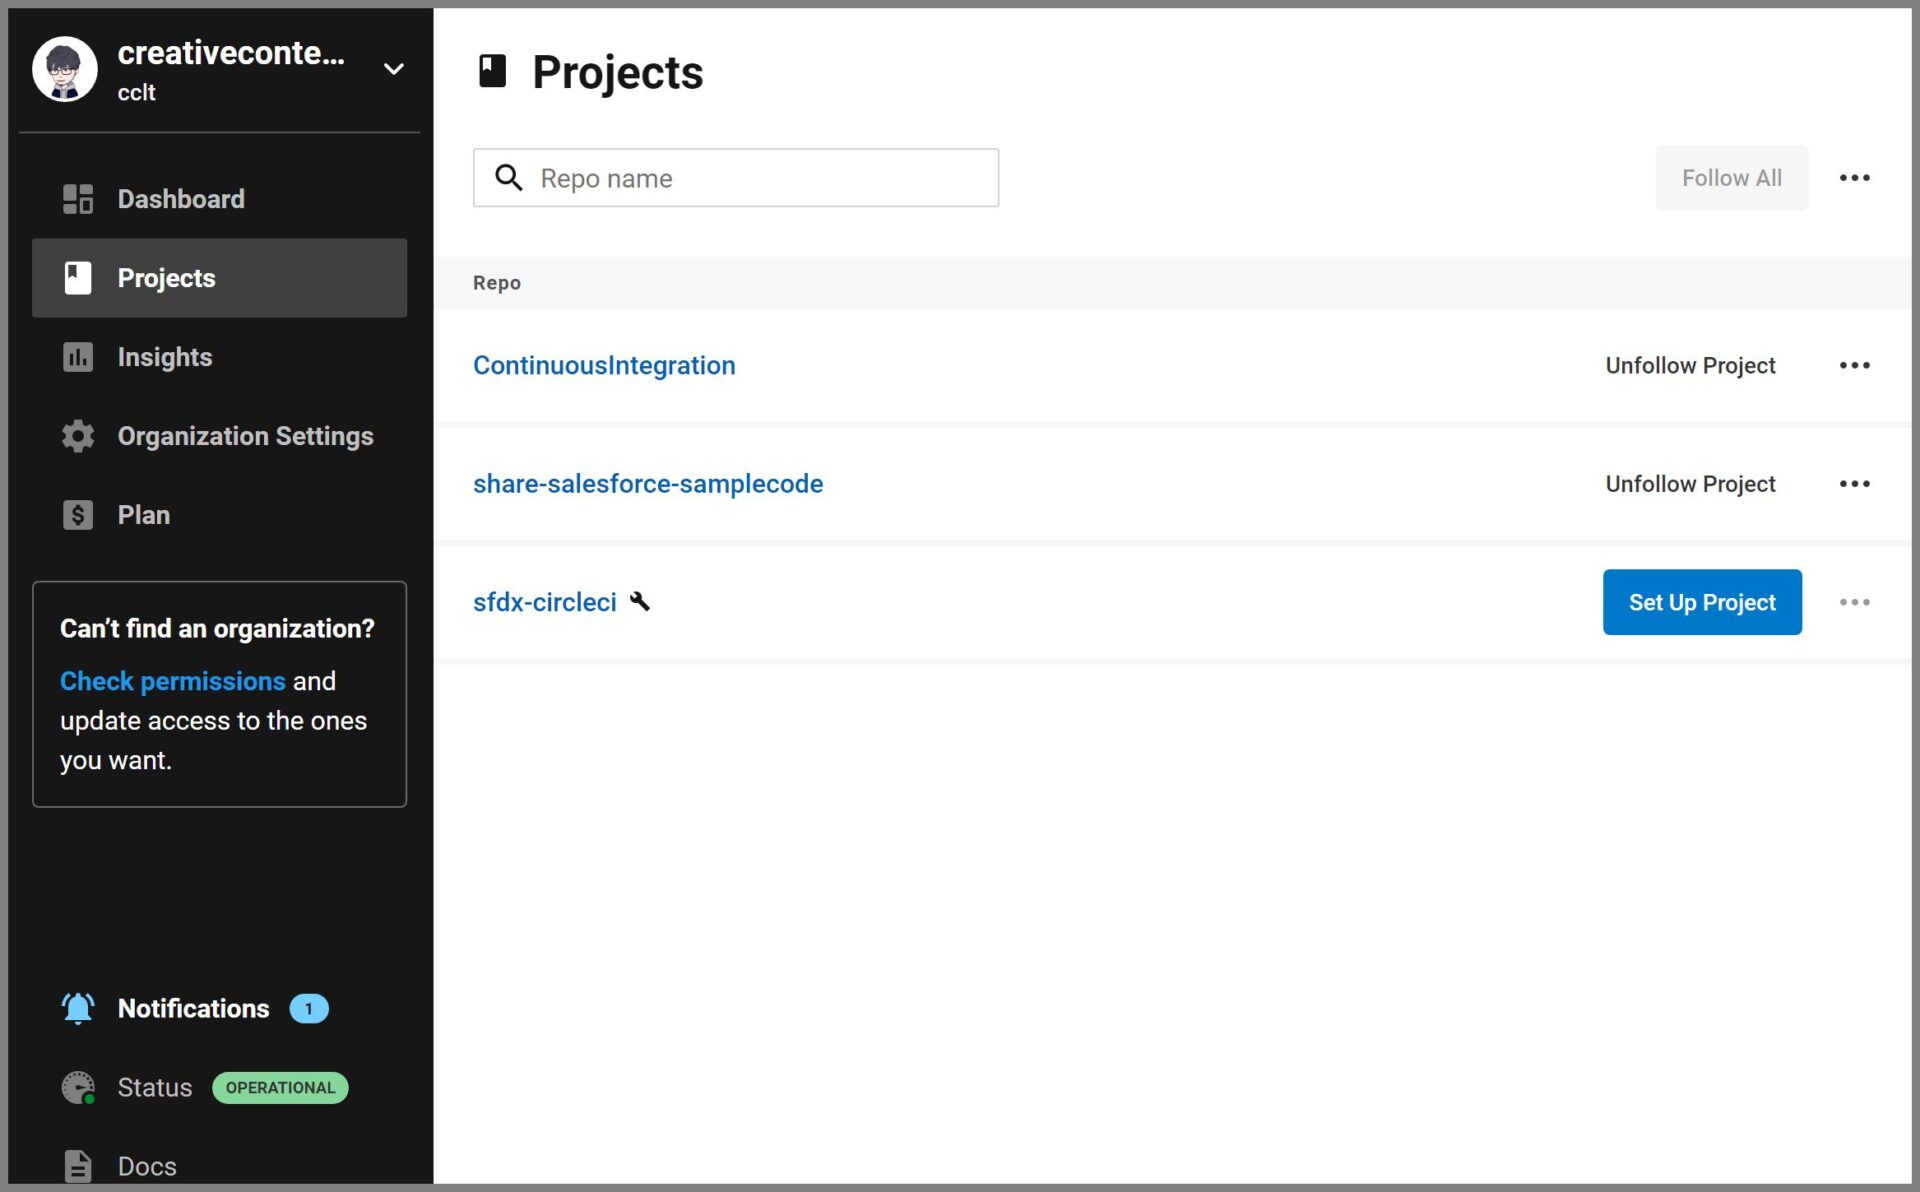
手順⑥次にCircleCIにログインして、プロジェクトメニューを表示します。
すると先ほどフォークしたsfdx-circleciのリポジトリが表示されているので、リポジトリ名のリンクをクリックします。
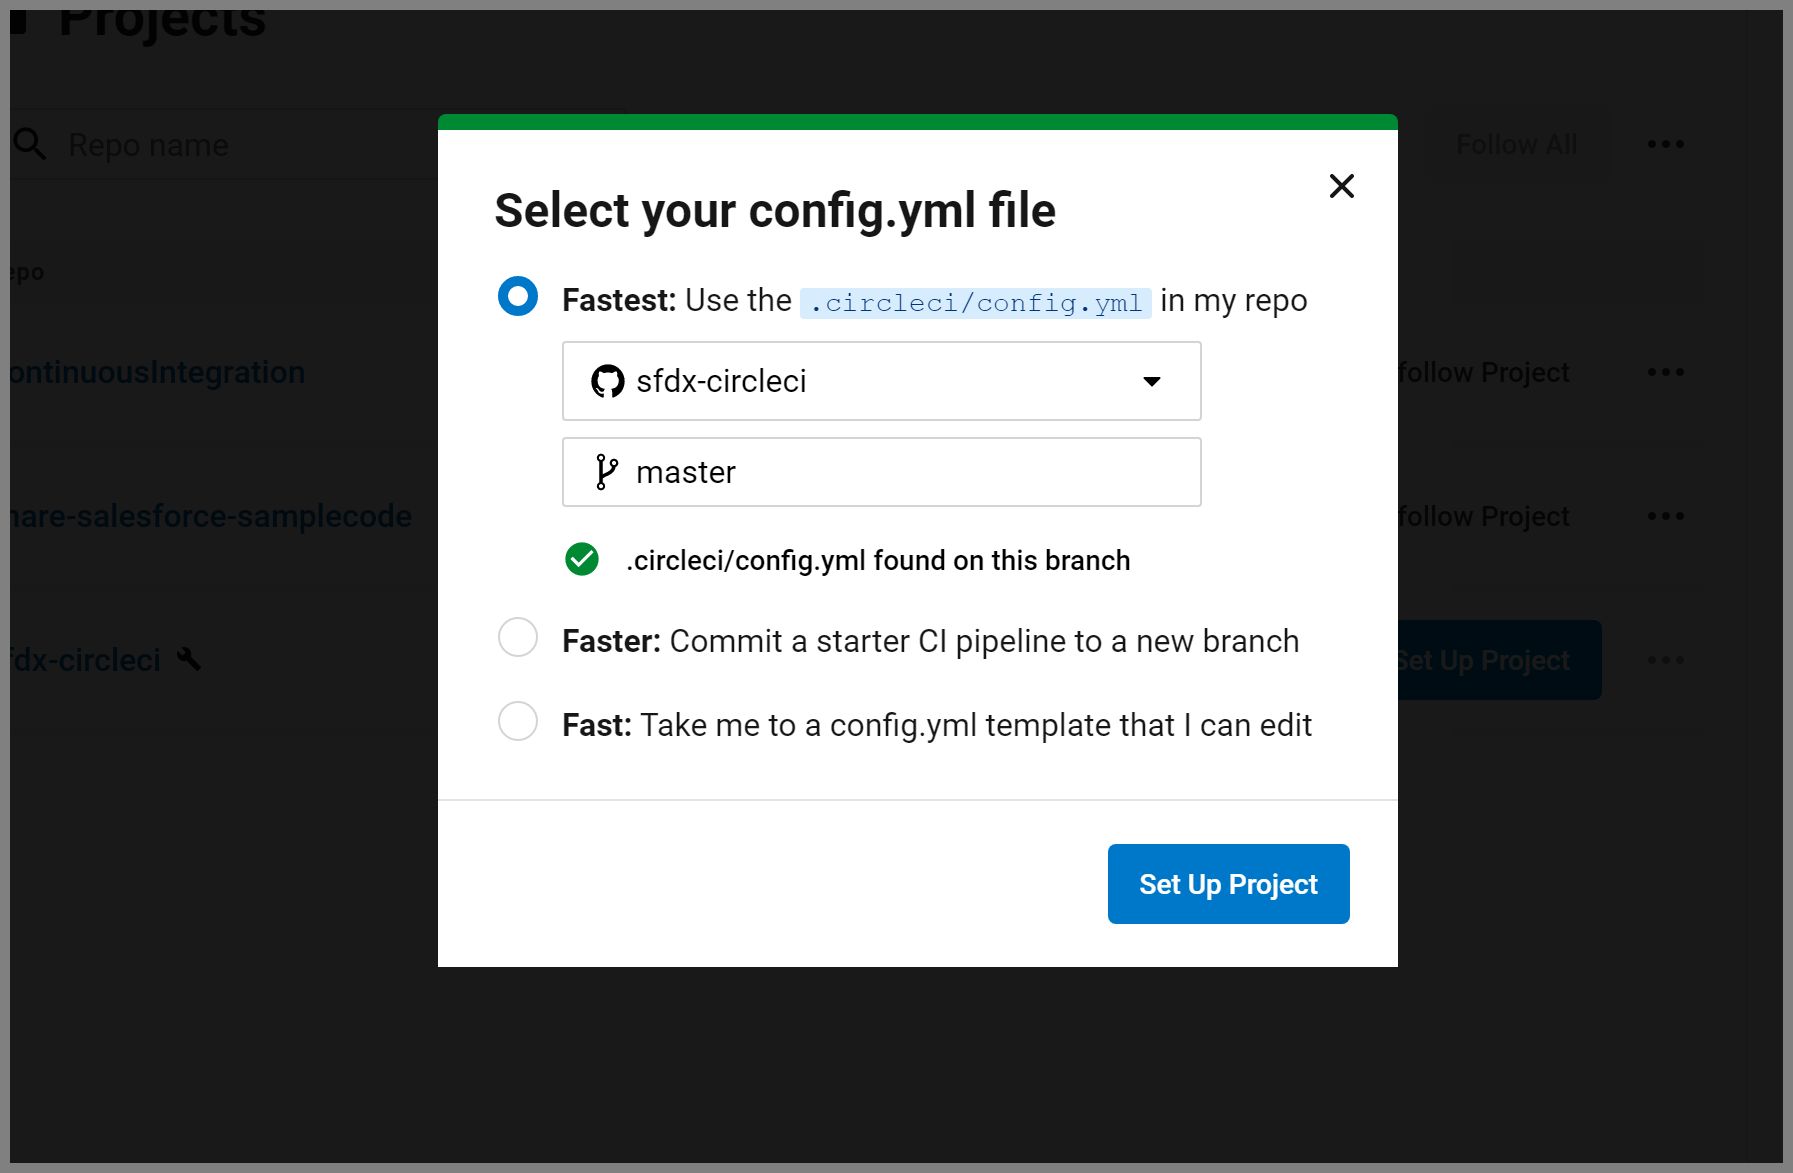
手順⑦config.ymlファイル選択画面が表示されます。sfdx-circleciに用意されているconfig.ymlをそのまま利用してSet up Projectを実行します。
手順⑧新規プロジェクトが作成されPipelineが実行されます。

手順⑨初回(環境設定を行っていない状態)では、実行結果がFailedとなります。
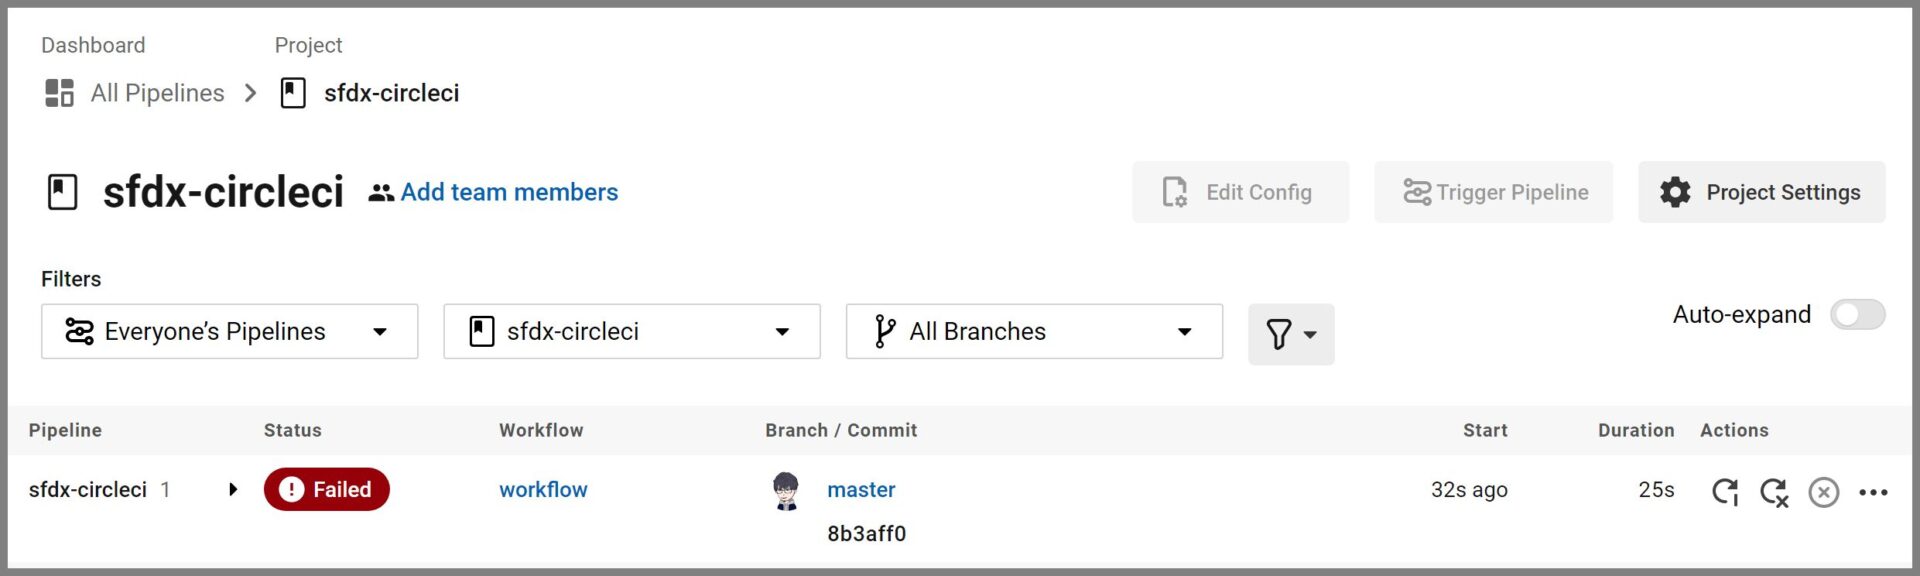
ビルドにエラーの原因が表示されます。※環境設定などを実施しない限り必ずエラーとなります。
.jpg)
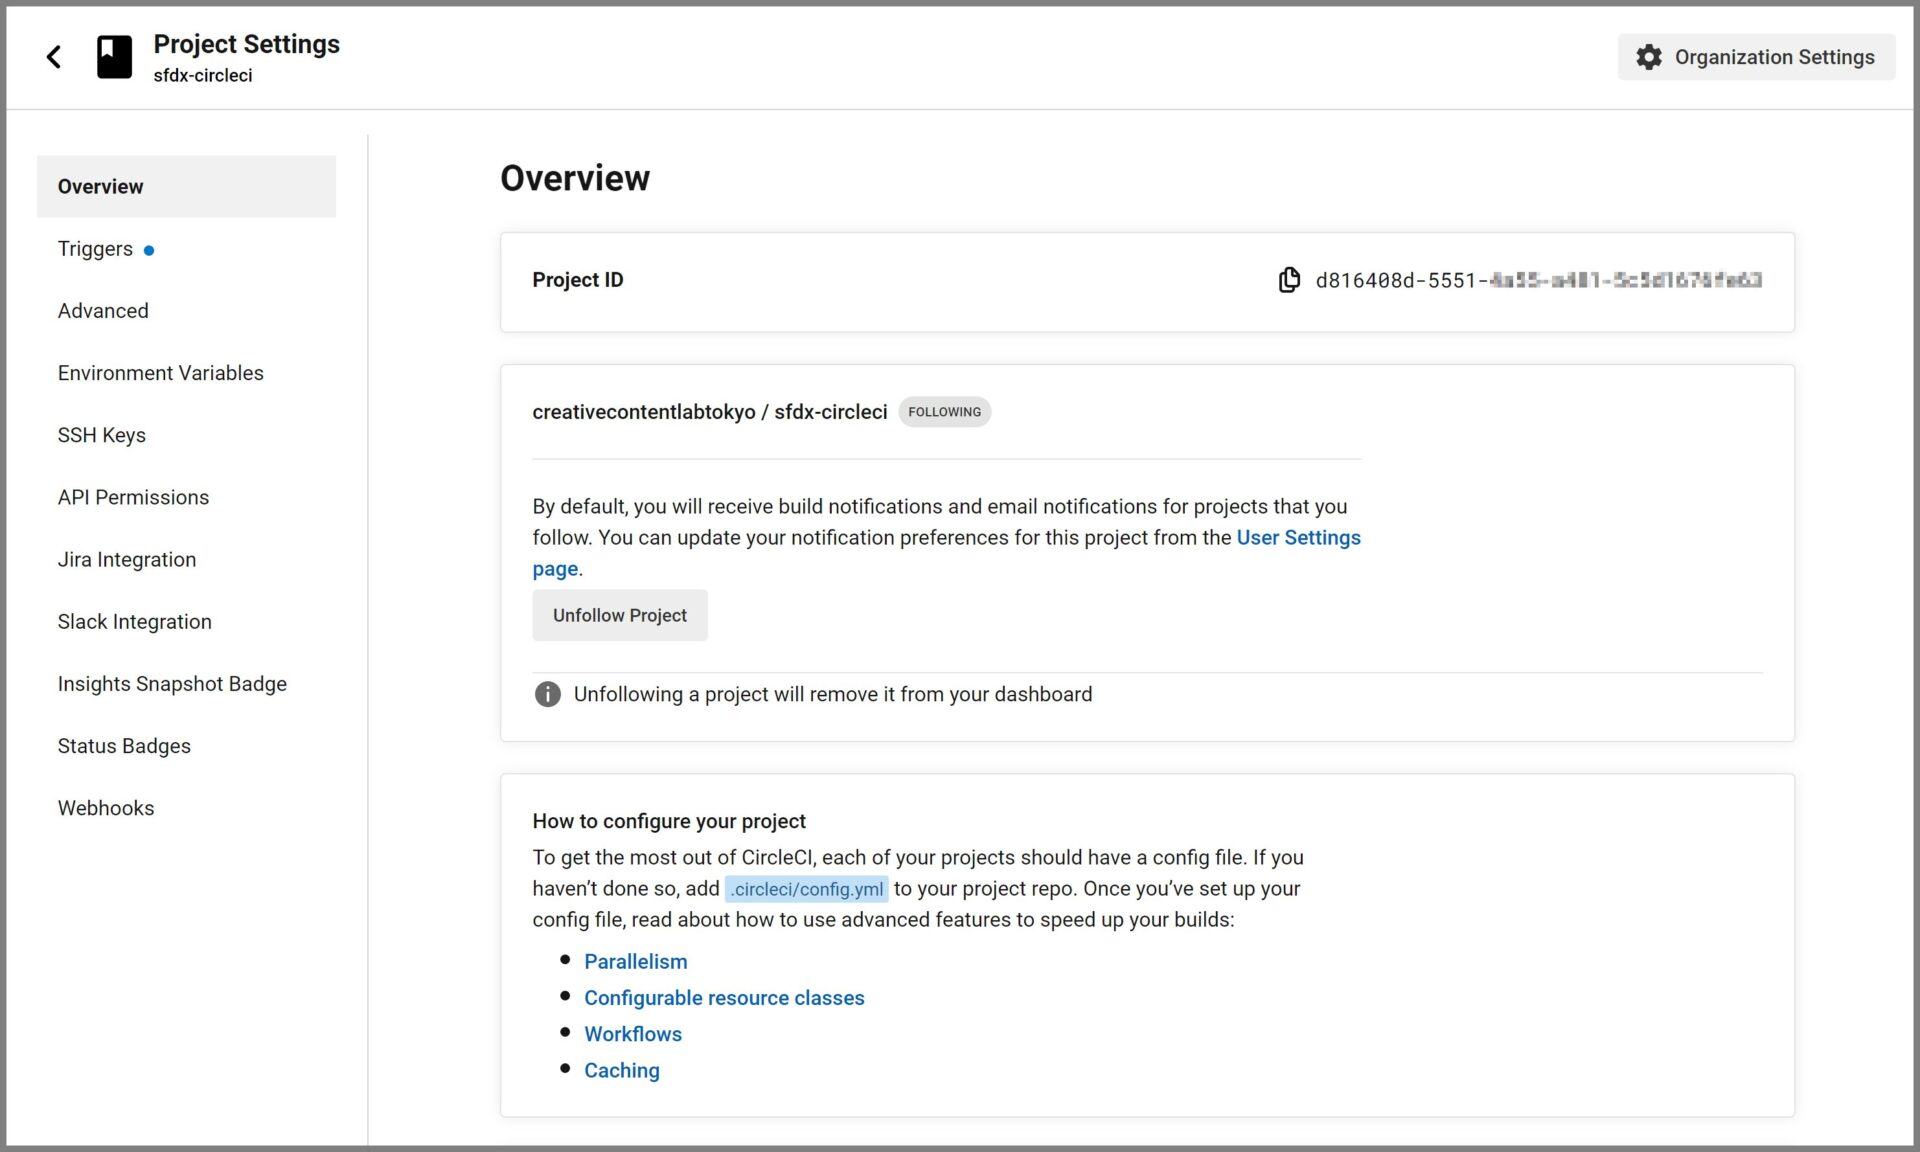
手順⑩続いて環境設定を行います。実行結果の右側に表示されている・・・ボタンをクリックして、プロジェクト設定(Project Settings)メニューを表示します。

手順⑪プロジェクト設定画面で環境変数の設定(Environment Variables)メニューを実行します。
手順⑫以下の環境変数設定画面で、Add Environment Variableをクリックします。

手順⑬環境変数の登録画面で、以下4つのパラメータを指定します。

【登録する環境変数と値】
- [HUB_CONSUMER_KEY]:作成したSFDCの接続アプリケーション画面で生成されたコンシューマ鍵を指定します。
- [HUB_SFDC_USER]:組織に接続するユーザ名を指定します。
- [DECRYPTION_KEY]:server.keyファイルの暗号化の際に生成したkeyを指定します。
- [DECRYPTION_IV]:server.keyファイルの暗号化の際に生成したivを指定します。
※2番目のパラメータについて、Salesforceの説明サイトでは、HUB_SFDX_USERとなっていますが、sfdx-circleciから取得したconfig.ymlを確認すると正しくは、$HUB_SFDC_UESRとなっているので、間違えないように注意してください。

手順⑭続いて、server.key.encファイルを更新します。
コマンドプロンプトを起動して以下のコマンドを実行します。sfdx-circleciリポジトリをローカル環境へクローンします。
</p>
<p>> cd C:\Users\e\dev\jdoe\JWT ※JWTフォルダへ移動(※Git専用のフォルダがあればそちらへ移動してもよいです)</p>
<p>>git clone https://github.com/<GitHubのユーザ名>/sfdx-circleci.git<br />
Cloning into ‘sfdx-circleci’…<br />
remote: Enumerating objects: 90, done.<br />
remote: Counting objects: 100% (24/24), done.<br />
remote: Compressing objects: 100% (21/21), done.<br />
remote: Total 90 (delta 9), reused 2 (delta 0), pack-reused 66<br />
Receiving objects: 100% (90/90), 357.09 KiB | 13.73 MiB/s, done.<br />
Resolving deltas: 100% (28/28), done.</p>
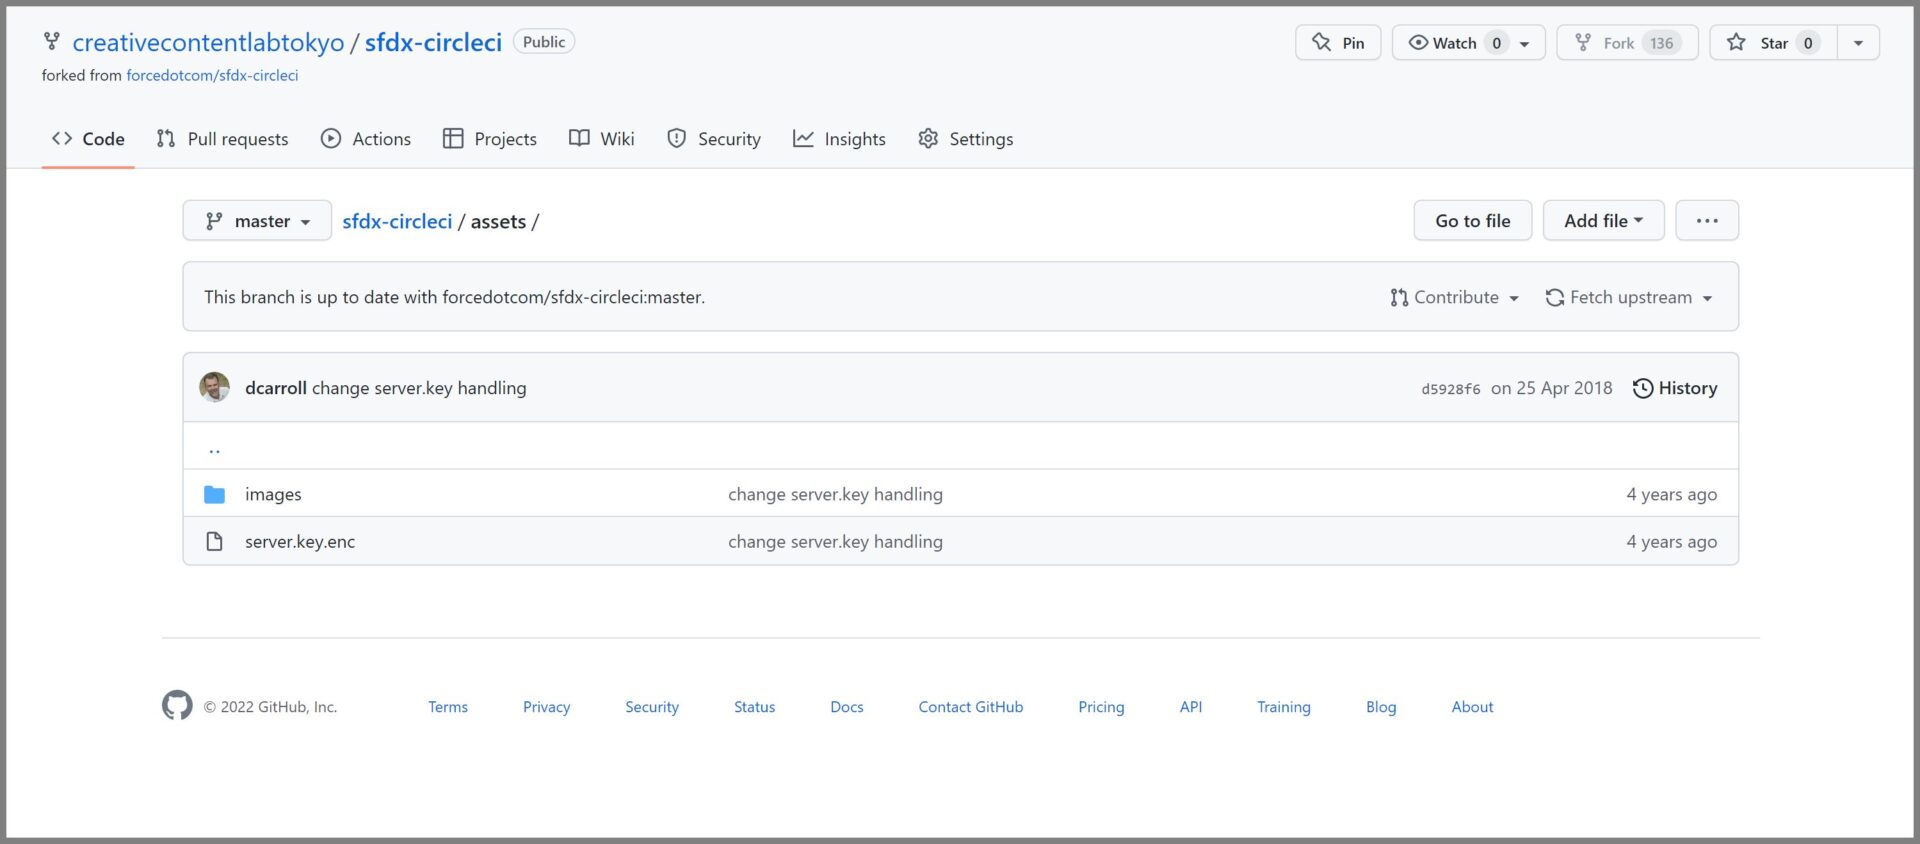
<p>手順⑮ローカルのgitへクローンが作成されたら..\sfdx-circleci\assets\配下にエンコードした[server.key.enc]ファイルをコピーします。
</p>
<p>>copy server.key.enc sfdx-circleci\assets\</p>
<p>
手順⑯リポジトリを作成したら次はgit addコマンドでファイルをインデックスに追加します。
</p>
<p>>cd sfdx-circleci\assets\</p>
<p>>git add server.key.enc</p>
<p>
手順⑰追加されたかステータスを確認
</p>
<p>>git status</p>
<p>On branch master<br />
Your branch is up to date with ‘origin/master’.</p>
<p>Changes to be committed:<br />
(use “git restore –staged <file>…” to unstage)<br />
new file: server.key.enc</p>
<p>
手順⑱追加されていることを確認したらコミットします
</p>
<p>>git commit -m “update server.key.end” -v</p>
<p>[master 827e48b] update server.key.end<br />
1 file changed, 37 insertions(+)<br />
create mode 100644 assets/server.key.enc</p>
<p>
手順⑲最後にgitにプッシュします。
</p>
<p>>git push</p>
<p>info: please complete authentication in your browser…<br />
Enumerating objects: 6, done.<br />
Counting objects: 100% (6/6), done.<br />
Delta compression using up to 8 threads<br />
Compressing objects: 100% (4/4), done.<br />
Writing objects: 100% (4/4), 2.13 KiB | 2.13 MiB/s, done.<br />
Total 4 (delta 1), reused 0 (delta 0), pack-reused 0<br />
remote: Resolving deltas: 100% (1/1), completed with 1 local object.<br />
To https://github.com/creativecontentlabtokyo/sfdx-circleci.git<br />
94c267b..827e48b master -> master</p>
<p>
※GitHubへのログイン認証が必要な場合はIDとパスワードを入力します。最後にリポジトリにserver.key.encファイルが登録されていることを確認します。
手順⑳CircleCIの画面に戻り、プロジェクト[sfdx-circleci]のConfigurationを実行します。
手順㉑config.ymlについて、以下2点の修正を行いSave&Runを実行します。
- –setdefaultdevhubusername -a hub ⇒ 今回は[my-hub-org]というエイリアスを使っていたのでこちらに修正します。
- force:org:createの –waitはデフォルト2ですが、3にしたほうがよいと記載があったので3に修正します。
</p>
<p>sfdx force:auth:jwt:grant –clientid $HUB_CONSUMER_KEY –jwtkeyfile assets/server.key –username $HUB_SFDC_USER –setdefaultdevhubusername -a <span style="color: #ff0000;">my-hub-org</span><br />
sfdx force –help<br />
sfdx force:org:create -s -f ~/ci_app/config/project-scratch-def.json -a circle_build_$CIRCLE_BUILD_NUM –wait <span style="color: #0000ff;">3</span></p>
<p>
手順㉒CircleCIの画面に戻って、再実行されたWorkflowの結果を確認しましょう
以下のSetup Orgの箇所で、Successfully Authorized ord ID ….と表示されていれば組織認証までは成功しています。
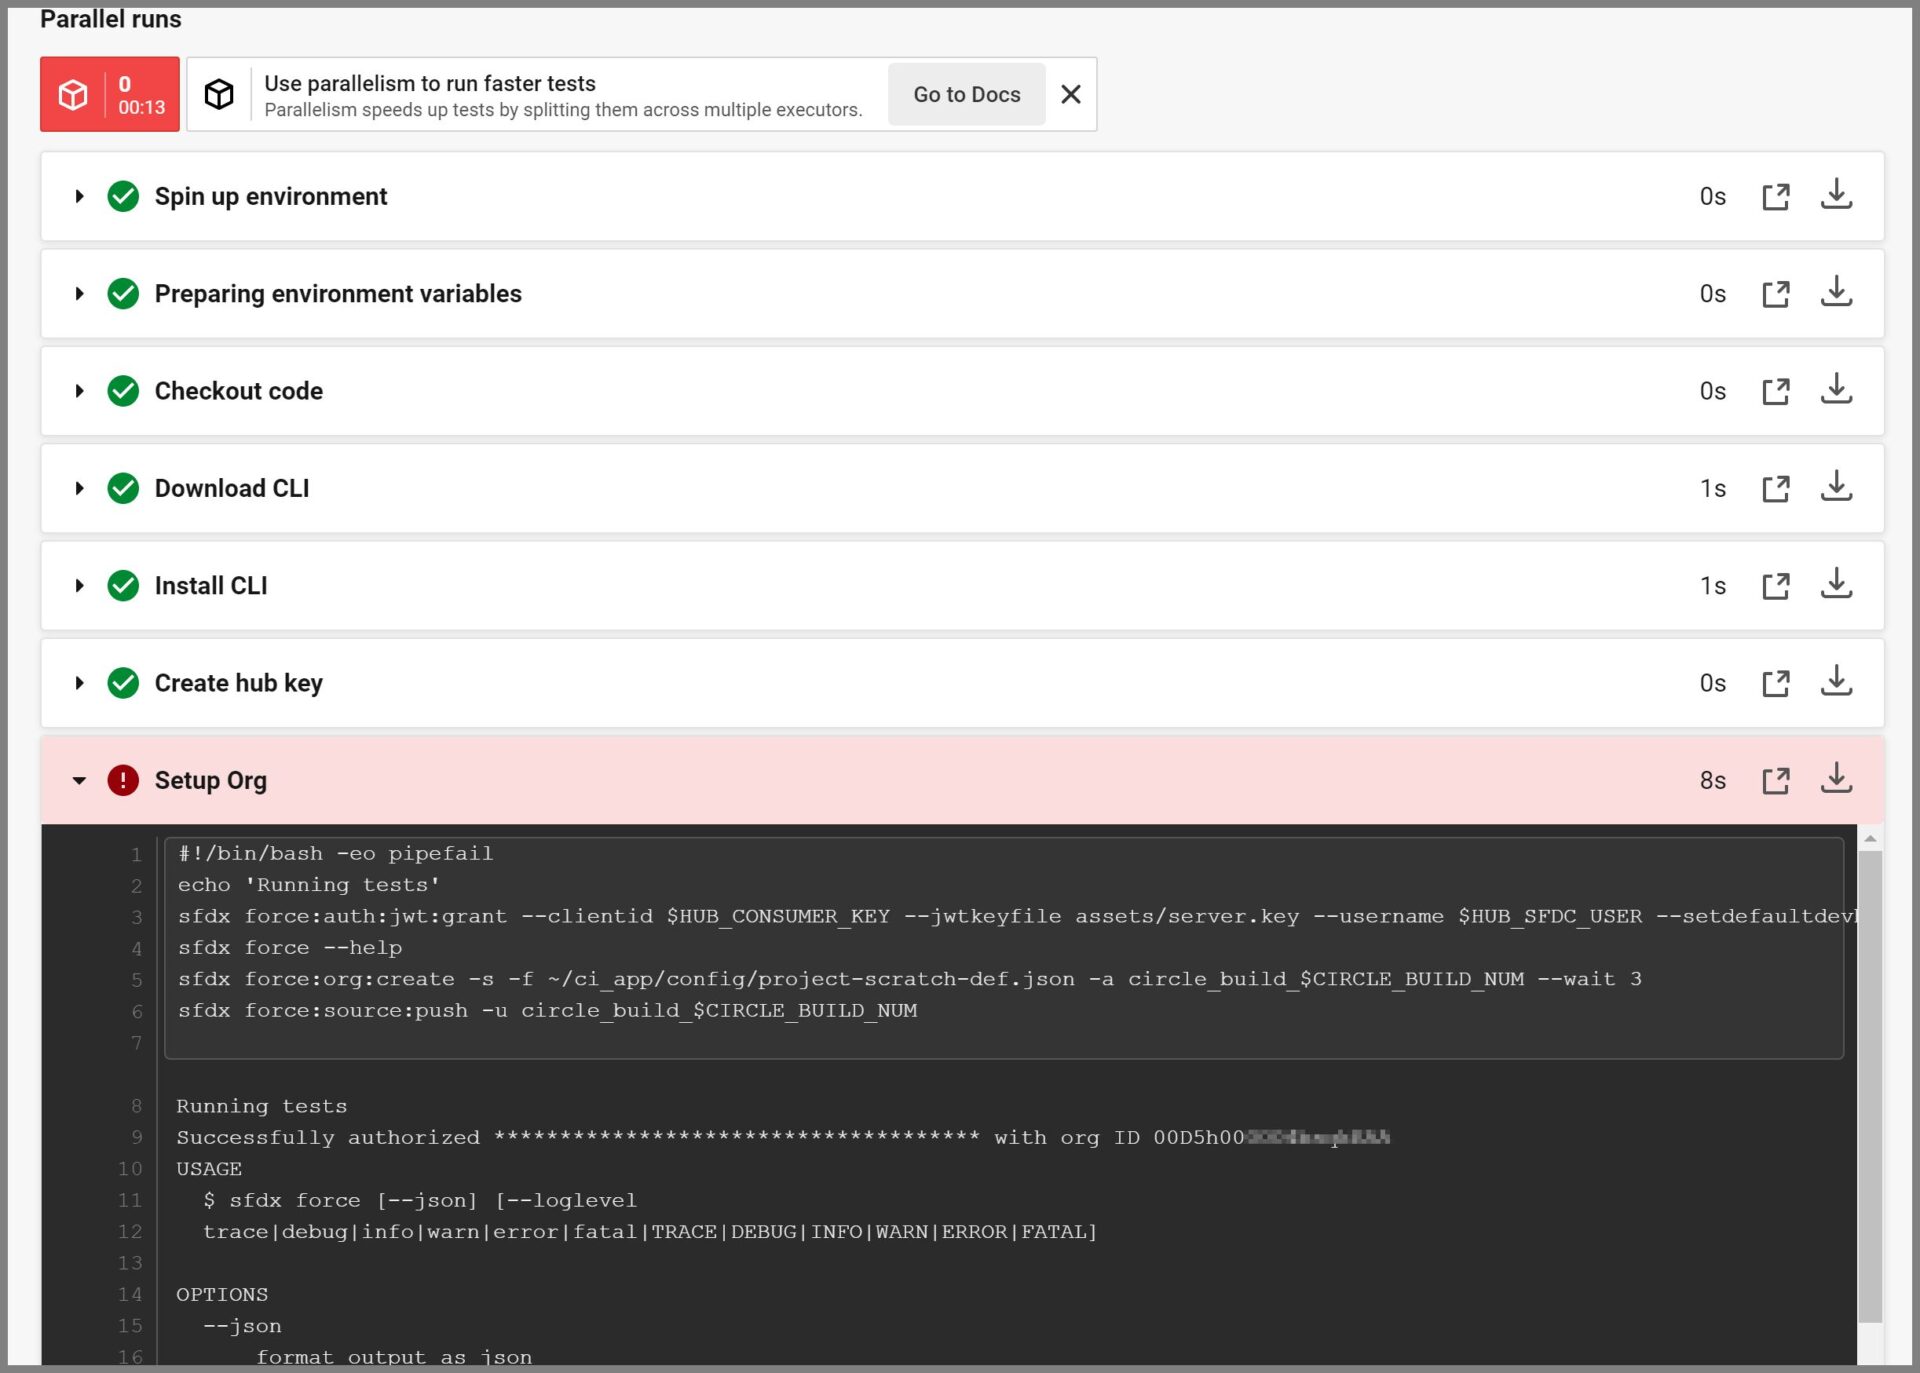
手順㉓Setup Orgで以下のエラーが発生していたので修正していきます。
</p>
<p><span style="color: #ff0000;">WARNING: Warning: If you’re using Contacts to Multiple Accounts, beginning with the Spring ’21 release, the feature isn’t automatically enabled. You must manually enable the setting for new scratch orgs. Enable the setting in one of these ways: update the Account Settings page in Setup, add the enableRelateContactsToMultipleAccounts setting to your scratch org definition file, or enable it via Metadata API.</span></p>
<p>ERROR running force:org:create: We’ve deprecated OrgPreferences. Update the scratch org definition file to replace OrgPreferences with their corresponding settings.</p>
<p><span style="color: #ff6600;">Replace the orgPreferences section:</span><br />
<span style="color: #ff6600;">{</span><br />
<span style="color: #ff6600;">“orgPreferences”: {</span><br />
<span style="color: #ff6600;">“enabled”: [</span><br />
<span style="color: #ff6600;">“S1DesktopEnabled”</span><br />
<span style="color: #ff6600;">]</span><br />
<span style="color: #ff6600;">}</span><br />
<span style="color: #ff6600;">}</span><br />
<span style="color: #ff6600;">With their updated settings:</span><br />
<span style="color: #ff6600;">{</span><br />
<span style="color: #ff6600;">“settings”: {</span><br />
<span style="color: #ff6600;">“lightningExperienceSettings”: {</span><br />
<span style="color: #ff6600;">“enableS1DesktopEnabled”: true</span><br />
<span style="color: #ff6600;">}</span><br />
<span style="color: #ff6600;">}</span><br />
<span style="color: #ff6600;">}</span><br />
For more info on configuring settings in a scratch org definition file see: https://developer.salesforce.com/docs/atlas.en-us.sfdx_dev.meta/sfdx_dev/sfdx_dev_scratch_orgs.htm.’</p>
<p>Exited with code exit status 1<br />
CircleCI received exit code 1</p>
<p>
手順㉓GitHubの[project-scratch-def.json]ファイルを以下のように修正します。
ファイルパス:sfdx-circleci/config/project-scratch-def.json
</p>
<p><span style="color: #ff6600;">{</span><br />
<span style="color: #ff6600;">“orgName”: “Sample Org”,</span><br />
<span style="color: #ff6600;">“edition”: “developer”,</span><br />
<span style="color: #ff6600;">“settings”: {</span><br />
<span style="color: #ff6600;">“lightningExperienceSettings”: {</span><br />
<span style="color: #ff6600;">“enableS1DesktopEnabled”: true</span><br />
<span style="color: #ff6600;">}</span><br />
<span style="color: #ff6600;">}</span><br />
<span style="color: #ff6600;">}</span></p>
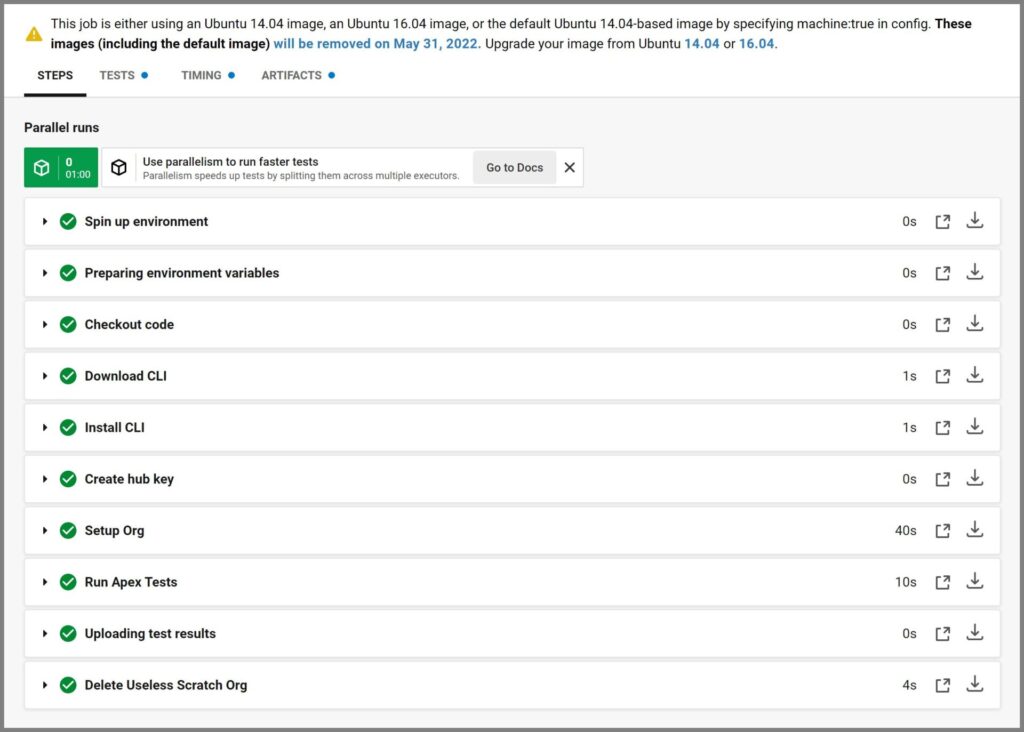
<p>手順㉔最後にもう一度CircleCIの画面からsfdx-circleciプロジェクトのworkflowを再実行してみます。
Run Apex Tests

Setup Org
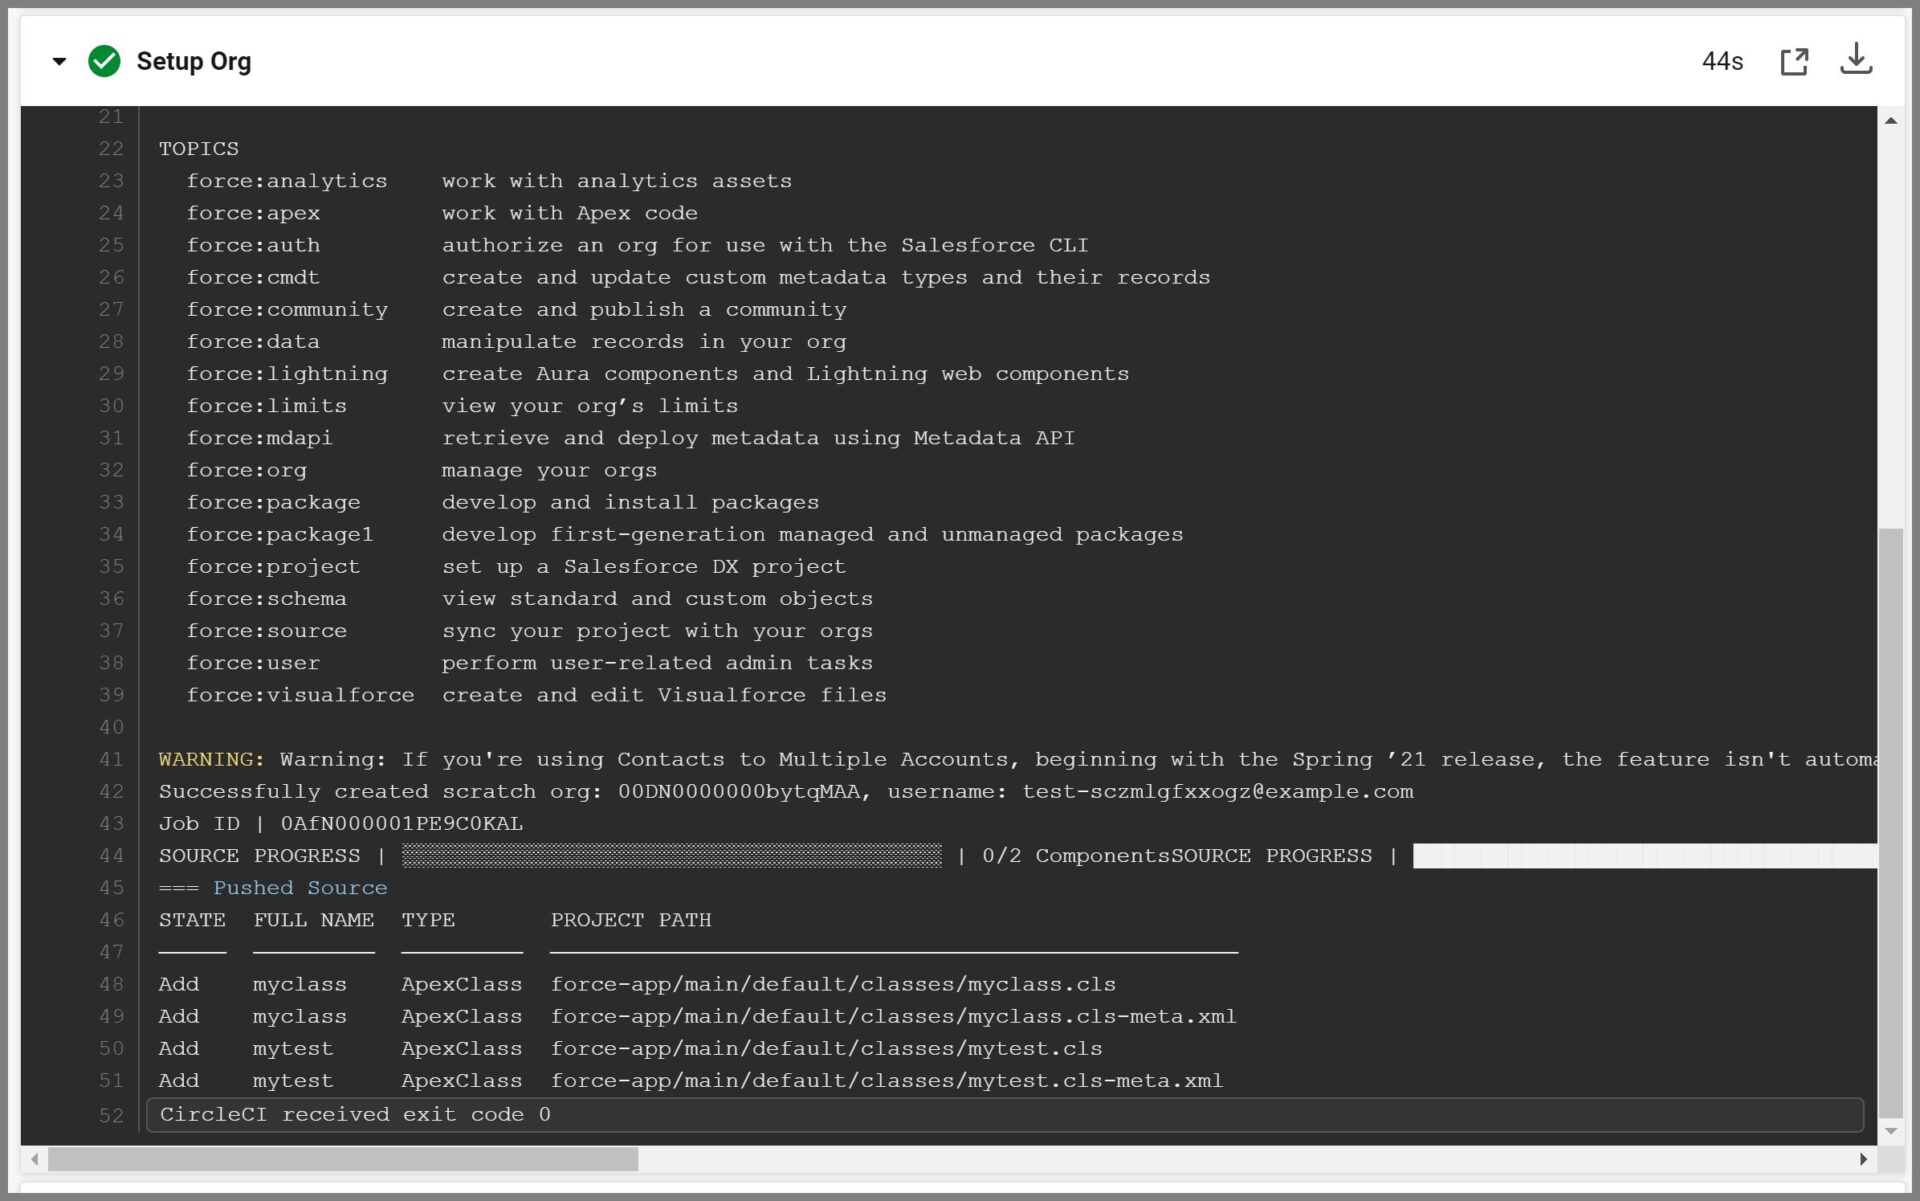
Uploading test results / Delete Useless Scratch Org

Parallel runs
全てSign up envirnmentから最後まですべて正常終了しました。
まとめ
今回の記事では、sfdx(CLI) と CircleCI を使って CI環境を作る手順について記しました。
GitHubの使い方やCircleCIなどのCI/DIツールについての基本知識がないと難しく感じる内容だったと思います。これを気に関係するツールや機能について学習することをお勧めします。
 サポーターさん